I feel awful that I haven’t blogged in so long! I don’t know where all the time has gone. This summer flew by and so did September. The only good thing about summer being over is that FALL is here 🙂 I absolutely love fall; the changing leaves, sweaters, apple cider… I could go on and ON! Our little town looks so beautiful this time of year.
Fall Crafts!
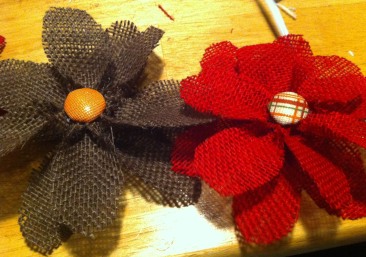
A few weeks ago, Gabby and I got a little crafty and made some wreaths for fall. We found the design on Pinterest and the original post was from Craftaholics Anonymous.

Materials:
Wreath form
1/3 yard burlap to cover the wreath
3 different colors of burlap (we used two because we couldn’t find a third color that looked good)
Scissors
Hot glue
Buttons
Scraps of fabric to cover the buttons (we used ribbon)
Steps:
- Wrap the wreath form with 2.5″ strips of burlap (we hot glued the strips at we went to make them looks as smooth as possible.)
- Cover the buttons in ribbon material or scrap fabric
- Cut the flower petals out of the colored burlap and glue together to create the flower
- Glue the buttons to the flowers and the flowers to the wreath

Sorry these instructions aren’t very detailed! The original post explains things really simply (and includes photos of steps I don’t have) so I would highly recommend that you check it out. I’m hoping to get a few more fall crafts done this month, so be sure to stop back for some more (EASY) projects 🙂


